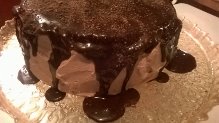
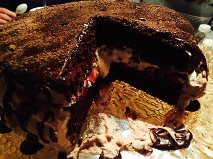
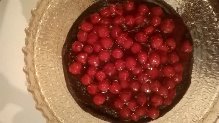
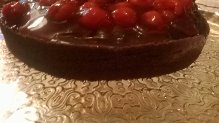
If you have been reading my blog for a while, you might remember that one of my best friends from High School, Angie aka Ange is a Valentine baby. Since a few lucky people had Valentine’s Day plans, I decided to make my Decadent Chocolate Cherry Cake for Angie on Valentine’s Day Eve which this year happened to also be Friday the 13th. Since she is a Valentine baby, I wanted to make something different from just a chocolate cake so I decided to add the cherries and get a little fancy with the icing. Actually, it looks like you spent a long time making the cake but really it only took about 1 1/2 hour including baking time. The cake portion of this cake is adapted from Hershey’s Perfectly Chocolate Cake, which is in my book one of the easiest most delicious cakes you can ever bake. It is so good, you can eat it without icing. Of course, I iced this one since it is a birthday cake. It looked gorgeous and tasted delicious. We all had a great time celebrating Angie’s birthday. Hope you try out my Decadent Chocolate Cherry Cake for your next celebration, you won’t regret it. Afiyet olsun!
- For the Cake:
- 2 cups sugar
- 1¾ cups all-purpose flour
- ¾ cup HERSHEY'S Cocoa
- 1½ teaspoons baking powder
- 1½ teaspoons baking soda
- 1 teaspoon salt
- 2 eggs
- 1 cup milk
- ½ cup vegetable oil
- Baking spray or shortening and flour for the pan
- 2 teaspoons vanilla extract
- 1 cup boiling water
- For the filling:
- ½ can Cherry Pie Filling
- 1 Cup Whipping Cream
- ¼ Cup Powdered Sugar
- For the Chocolate Glaze(reserve ½ cup for the icing:
- 1 Cup Sugar
- 1 Stick Butter
- ½ Cup Hershey's Cocoa powder
- 1 Cup Milk
- For the Chocolate Cream Icing:
- 1 Cup Whipping cream
- ½ Cup of the cooled Chocolate Glaze
- For Garnish optional:
- ¼ Cup Crushed Milk Chocolate chips (you could use the chocolate of your choice, dark, semi-sweet, etc.)
- Heat oven to 350°F.
- Spray two 9-inch round baking pans with baking spray or grease and flour them.
- Mix the sugar, flour, cocoa, baking powder, baking soda and salt in large bowl.
- Add eggs, milk, oil and vanilla; beat on medium speed of mixer 2 minutes.
- Stir in boiling water (batter will be thin).
- Pour batter into the cake pans.
- Bake 20 to 30 minutes (the original recipe calls for 25-35 minutes but I think this is too long) or until wooden pick inserted in center comes out clean.
- Cool 10 minutes then remove from pans to wire racks and cool completely.
- While the cake is baking, start making the chocolate glaze by combing the 1 cup sugar, 1 stick butter, ½ cup cocoa and the cup of milk in a medium-sized sauce pan.
- Turn the heat on medium high and use a whisk to make sure everything is completely combined.
- Once the mixture starts bubbling, reduce the heat to medium and continue to stir constantly until mixture thickens. This should take between 8 and 12 minutes.
- Remove from the heat and allow to cool.
- In a large mixing bowl, whip the whipping cream and powdered sugar until thick and fluffy.
- Once the cake is cooled, place one layer on a cake plate.
- Spread a thin layer of the Chocolate glaze over the top of the cake.
- Spread the cherry pie filling to within ½ inch from the edge of the cake.
- Spread the Whipped cream over the cherries.
- Place the top layer on the cake.
- Slowly, pour some of the Chocolate Glaze over the top of the cake to the edge.
- Next, make the Chocolate Cream icing by whipping the cream until stiff.
- Add the ½ cup reserved Chocolate Glaze and whip till fluffy.
- Spread this icing only around the sides of the cake filling in the space between the layers.
- Next, pour any remaining Chocolate Glaze over the top of the cake letting it drizzle over the edge of the cake.
- Sprinkle on the crushed chocolate for garnish if desired. Afiyet olsun!